Tuesday, 25 March 2014

Use XRMToolbox to modify the CRM 2013 Site Map

Below outlines how to modify the Sitemap using the XRM tool box.
Scope: add a new are called Tenancies with contacts , Registration applications and dispute Cases

1. Download the Xrm Tool Box package from
http://xrmtoolbox.codeplex.com/releases/view/119275
2. Extract and run the XrmToolBox.exe
3. Add a new Connection vie the Connect to CRM button and then click New Connection. Populate your CRM details.
4. Scroll Down to Sitemap editor and let it open. Click LoadSiteMap
5. Right Click on the Sitemap Node and Add Area . Set the Title and Description as Tenancies

6. Add a Group by right clicking on the Area Just Created . Set the title and Description to Tenancies.

 7. Add 3 areas  one for each of contact ,Registration Application and Dispute Case. The only property that needs to be set for each is the entity.
8 Click Update Sitemap
9. Publish all customization in CRM
10. The New area Tenancies will now be available in CRM after a refresh  of the browser (Xtrl +F5)

Note : You can copy and paste existing nodes . For example the cases area has a sub area for Queues. This can copy and pasted into other Areas/Groups.


Add Mail merge button in CRM 2013 with Ribbon Workbench

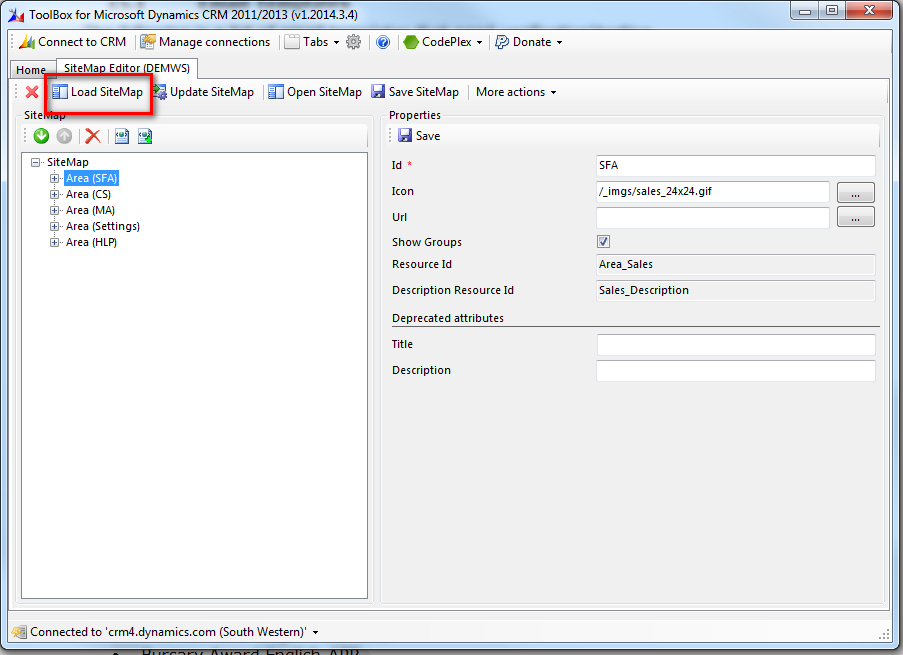
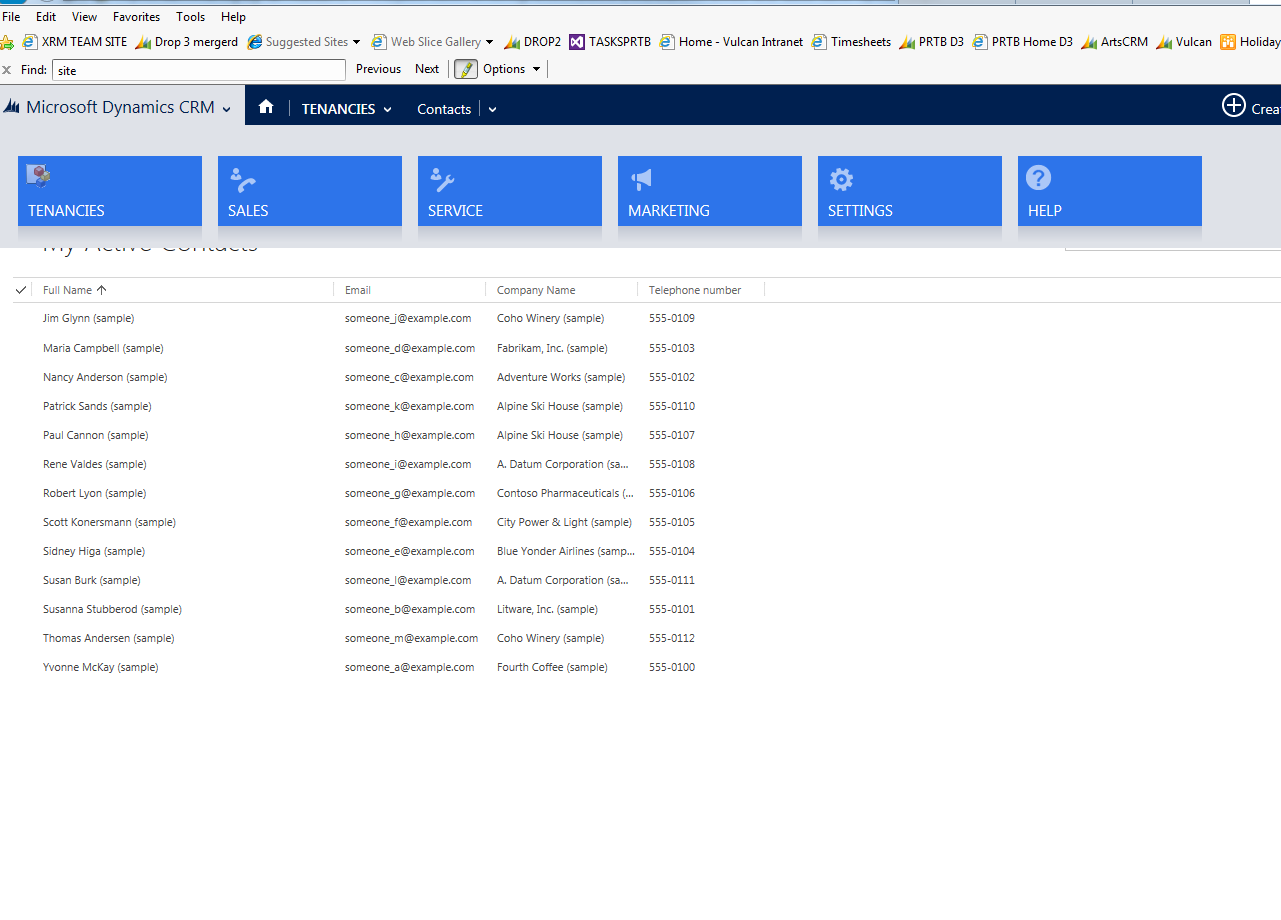
Below is an example on how to modify the Site map using Ribbon Workbench.
Scope: Enable the Mail merge Button on the contact Entity


1. Download the Workbench located (See download fro Crm 2013)
    http://www.develop1.net/public/page/Ribbon-Workbench-for-Dynamics-CRM-2011.aspx
2. Import the downloaded Solution in your CRM solution

3. Refresh Your Browser (Ctrl+ F5)
4. Navigate to Settings>Customization. The Ribbon Workbench Should be located there
5. When you open Ribbon Workbench , you will be prompted to Select your Solution
6. The Work Bench looks like this with a vast amount of areas you can edit. You can add toolbox items to the Home, Sub Grid and Form by Drag and Drop
7. To add a button the the contact entity form ribben, Select Form Bar then The command Bar tab , the contact entity and then Buttons

8. Now Select The Ribbon Tab


9. Drag a drop a new Button To the location You want
10.Fill Out the button Properties as below. The id should be unique but the rest of the settings must be as is below


11. You now need to make the Button visible(it is invisible by default)
12. This will add in some Command options

13. Right click on the Mscrm.MailMergeProperty and then Edit Display Rules
14. Remove The Mscrm.HideOnCommandBar
15.Publish. The Mail merge Button is now available on the contact.
Grids

Adding the mail merge button to the Grid or Sub Grid is different.
1. First Add a new Command Called MSCRM.MailMerge.Grid

2.Add a new action of type javascript function action .  Define the FunctionName as Mscrm.GridRibbonActions.webMailMerge and Library as /_static/_common/scripts/RibbonActions.js


3. Add the following parameters
CrmParameter Value="SelectedControl"
CrmParameter Value="SelectedControlSelectedItemIds"
CrmParameter Value="SelectedEntityTypeCode"
CrmParameter Value="SelectedControlAllItemCount"

4. Set the display Rules to the following


5. Set the enabled rules to the following


6. Drag and drop a button from the toolbox to the Grid to the desired location

7. Define the Following Properties in the button


Friday, 21 March 2014

CRM 2013 Leo Release

Below is a brief outline of what is in the Leo release


  • On Premise and online will have the same release
  • Email Synchronization will allow for Exchange as well as pop now 
  • The share point folder mapping by name will now be replaced by direct API connections  
  • New Queuing functionality allows for Public and provide queues
  •  In the service area SLA and entitlement can be tracked.
  • There is a timer control on the case to give visual indication of due date in relation to SLA
  • Unified Service Desk is a locally installed Desktop application with synchronization back into CRM. Exposure of nearly every everything(entities forms views) can be configured to be exposed on USD
  • Further Mobile, tablet and now android  capabilities.Users can now choose between mutable organisations
  • Administrators will have the ability to take a backup of their production organization and restore it to a new organization to use for scenarios like development or testing. 
  • Another feature will be the ability to disable any background operations like email processing, Yammer, etc… so that integrations with external production systems won’t initially be getting data from a new non-production CRM instance. 

Monday, 10 March 2014

Crm 2013 Unsupported CRM 4.0 & Legacy Features


The following Microsoft Dynamics CRM features, which you could be using with your CRM 2011 system, will no longer be supported within Microsoft Dynamics CRM 2013.
  • 2007 Web Service Endpoint
  • ISV folder – you might have used this for custom web applications. Create all custom web applications as new Web Sites in IIS for CRM 2013.
  • CRM 4.0 Plug-ins
  • CRM 4.0 Client-Side ScriptingcrmForm syntax is no longer supported. Xrm.Pageobjects are required in CRM 2013.
  • CRM 4.0 Custom Workflow Activities
  • Solution Down Level Tool
  • DOM Manipulations
The Legacy Feature Check Tool (http://go.microsoft.com/fwlink/p/?LinkID=309565) can be used to dive deep into your CRM 2011 system and detect any of the legacy features listed above.
Another couple of tools to assist with your upgrades are:
The following list outlines the Microsoft software supported with Microsoft Dynamics CRM 2013.
    • Internet Explorer – 8, 9 & 10. Note: No support for Internet Explorer 11 at the time of writing this article.
    • Dynamics CRM – CRM 2011 Update Rollup 6 or CRM Update Rollup 14+ (for the upgrade)
    • Outlook – 2007,2010 & 2013
    • SQL Server – 2008, 2008 R2 & 2012. Note: No support for SQL Server 2014 at the time of writing this article.
    • Windows Server – 2008 SP2, 2008 R2 & 2012
    • Exchange Server – 2007, 2010 & 2013
    • Windows Client – Vista, Windows 7 & Windows 8. Note: No Support for Windows 8.1 at the time of writing this article.
    • ADFS – 2.0, 2.1 & 2.2

Wednesday, 5 March 2014

Create Early Bound Types Library

The following are steps on how to create the early bound types library.

Open Command prompt

Cd to the \SDK\Bin folder of the CRM 2013 sdk

then run the following Command: CrmSvcUtil.exe /codeCustomization:"Microsoft.Xrm.Client.CodeGeneration.CodeCustomization,Microsoft.Xrm.Client.CodeGeneration" /url:https://dttas.api.crm4.dynamics.com/XRMServices/2011/Organization.svc /domain:artscouncil /username:scunningham@DTTAS.onmicrosoft.com /password:###### /out:"Xrm.cs" /namespace:ArtsCouncil.Xrm /serviceContextName:XrmServiceContext /servicecontextprefix:Xrm /generateActions
The command parameters which require input are flagged in red which mean the following:
 Property
 Value
URL
The URl of the organisation service . This is available via the developer          Resources area in the CRM customization section
 domain
 The Domain of where the CRM instance resides. not needed if connecting online. 
 username
the admin username
 Password
the admin password
 Namespace
The namespace for the generated code. Default namespace is the global namespace
 Servicecontextname
The name of the generated organization service context class. If no value is supplied, 
no service context is created.

A file called Xrm.cs will be generated and placed in the  \SDK\Bin folder with a namespace ArtsCouncil.Xrm
Open Visual studio and create a new Project called ArtsCouncil.Xrm. Add the Xrm.cs as a class and delete the default class. Make sure the library .net framework is .net 4
Sign the assembly if its to be used by Plugins 

Add a reference to following dlls. these are in the same bin folder \SDK\Bin
·         Microsoft.Xrm.Sdk.dll
·         Microsoft.Xrm.Portal.dll
·         Microsoft.Xrm.Client.dll
Add the following references from the GAC(.net tab)
·         System.Runtime.Serialization.dll
·         System.Data.Services.dll
·         System.Data.Services.Client.dll

Build. You now have an Early Bound Types Library. The XRM.cs class can overwritten as new customizations get added.

An Example of an on-premise Instance
CrmSvcUtil.exe /codeCustomization:"Microsoft.Xrm.Client.CodeGeneration.CodeCustomization,Microsoft.Xrm.Client.CodeGeneration" /url:http://vs-vm-env/Test/XRMServices/2011/Organization.svc /domain:vsvirtual /username:administrator /password:######## /out:"C:\Xrm.cs" /namespace:VS.PRTB.CRM.DataModel /generateActions

OptionSets

The SDK includes an extension to the CrmSvcUtil to generate OptionSet enumerations. Previously, the tool only generated enums for the StateCode attributes, leaving it as a manual task to create your own enums for any OptionSet values you needed.

Using the extension:

Using Visual Studio, compile the project found at:
sdk\samplecode\cs\crmsvcutilextensions\generatepicklistenums
Edit the 'generateoptionsets.bat' file in the bin\Debug folder, replacing the /url: parameter with the url of your own CRM server.
Double click the 'generateoptionsets.bat', and wait…
You'll see an 'OptionSets.cs' file created in the Debug folder.

You simply need to include this file in any of your projects and use when setting OptionSet values, being sure to cast as (int).

SQL Server Dates

Today
SELECT GETDATE() ‘Today’
Yesterday
SELECT DATEADD(d,-1,GETDATE()) ‘Yesterday’
First Day of Current Week
SELECT DATEADD(wk,DATEDIFF(wk,0,GETDATE()),0)’First Day of Current Week’
Last Day of Current Week
SELECT DATEADD(wk,DATEDIFF(wk,0,GETDATE()),6) ‘Last Day of Current Week’
First Day of Last Week
SELECT DATEADD(wk,DATEDIFF(wk,7,GETDATE()),0) ‘First Day of Last Week’
Last Day of Last Week
SELECT DATEADD(wk,DATEDIFF(wk,7,GETDATE()),6) ‘Last Day of Last Week’
First Day of Current Month
SELECT DATEADD(mm,DATEDIFF(mm,0,GETDATE()),0)’First Day of Current Month’
Last Day of Current Month
SELECT DATEADD(ms,-3,DATEADD(mm,0,DATEADD(mm,DATEDIFF(mm,0,GETDATE())+1,0)))’Last Day of Current Month’
First Day of Last Month
SELECT DATEADD(mm,-1,DATEADD(mm,DATEDIFF(mm,0,GETDATE()),0))’First Day of Last Month’
Last Day of Last Month
SELECT DATEADD(ms,-3,DATEADD(mm,0,DATEADD(mm,DATEDIFF(mm,0,GETDATE()),0)))’Last Day of Last Month’
First Day of Current Year
SELECT DATEADD(yy,DATEDIFF(yy,0,GETDATE()),0)’First Day of Current Year’
Last Day of Current Year
SELECT DATEADD(ms,-3,DATEADD(yy,0,DATEADD(yy,DATEDIFF(yy,0,GETDATE())+1,0)))’Last Day of Current Year’
First Day of Last Year
SELECT DATEADD(yy,-1,DATEADD(yy,DATEDIFF(yy,0,GETDATE()),0))’First Day of Last Year’
Last Day of Last Year
SELECT DATEADD(ms,-3,DATEADD(yy,0,DATEADD(yy,DATEDIFF(yy,0,GETDATE()),0)))’Last Day of Last Year’
Ref:https://community.dynamics.com/crm/b/marcellotonarelli/archive/2014/03/04/microsoft-sql-server-date-function.aspx

Monday, 3 March 2014

2013 Business Process Flows Limits

Did you now that Microsoft Dynamics CRM 2013 Business Process Flows:
  • Are considered processes and are created from the Process area in the Settings module
  • You can have up to 10 active process flows per entity
  • Can contain up to 30 stages
  • One process flow can use up to five different entities
  • Users can switch process flows if needed
  • Can be restricted based on security roles
  • Order determines the default process flow used