Scope: add a new are called Tenancies with contacts , Registration applications and dispute Cases
1. Download the Xrm Tool Box package from
http://xrmtoolbox.codeplex.com/releases/view/119275
2. Extract and run the XrmToolBox.exe
3. Add a new Connection vie the Connect to CRM button and then click New Connection. Populate your CRM details.
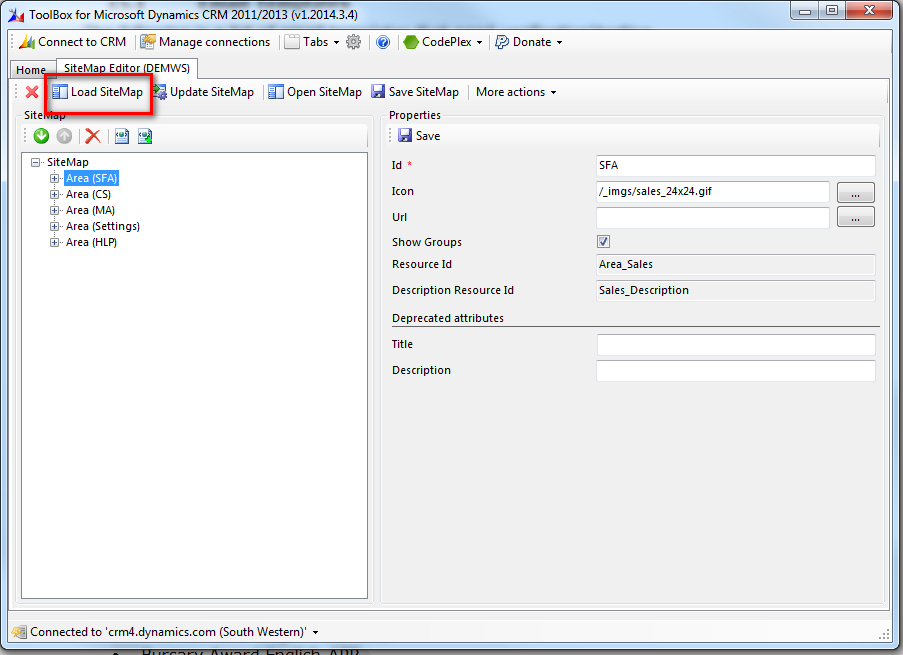
4. Scroll Down to Sitemap editor and let it open. Click LoadSiteMap
5. Right Click on the Sitemap Node and Add Area . Set the Title and Description as Tenancies
6. Add a Group by right clicking on the Area Just Created . Set the title and Description to Tenancies.
8 Click Update Sitemap
9. Publish all customization in CRM
10. The New area Tenancies will now be available in CRM after a refresh of the browser (Xtrl +F5)

Note : You can copy and paste existing nodes . For example the cases area has a sub area for Queues. This can copy and pasted into other Areas/Groups.


how to define a image for that new element ?
ReplyDeleteI believe you just set the icon to a file that you have already uploaded (or can upload) to the organization.
Delete